Jekyll is a free open-source SSG that is built and runs on the Ruby programming language. You don’t need to understand how Ruby works to use Jekyll; you only need to have Ruby installed on your machine.
Jekyll can be used to build various types of static sites such as a personal blog, portfolio website, and documentation website without needing a database or using a content management system like WordPress.
How To Install Jekyll
You first need to install Ruby on your machine before you can proceed to install the Jekyll as stated in the Jekyll documentation.
How To Install Jekyll on macOS
By default, Ruby comes preinstalled with macOS, but it’s not recommended you use such a version of Ruby to install Jekyll because it’s old. For example, on Ventura, Apple’s latest operating system, the version of Ruby that comes preinstalled is 2.6.10, of which the latest version is 3.1.3 (as of when this article is written).
To fix this, you’d need to install Ruby correctly using a version manager such as chruby. You’d need to install Homebrew on your Mac first using the command below in your terminal:
/bin/bash -c "$(curl -fsSL https://raw.githubusercontent.com/Homebrew/install/HEAD/install.sh)"
Once the installation is successful, quit and restart Terminal, then check if Homebrew is ready to go by running this command:
brew doctor
If you get “Your system is ready to brew”, you can now move on to install chruby and ruby-install with the command below:
brew install chruby ruby-install
You can now install ruby’s latest version which is 3.1.3 using the ruby-install package you just installed:
ruby-install 3.1.3
This will take a few minutes. Once it’s successful, configure your shell to automatically use chruby with the command below:
echo "source $(brew --prefix)/opt/chruby/share/chruby/chruby.sh" >> ~/.zshrc
echo "source $(brew --prefix)/opt/chruby/share/chruby/auto.sh" >> ~/.zshrc
echo "chruby ruby-3.1.3" >> ~/.zshrc
You can now quit and relaunch your terminal, then check that everything works by running this command:
ruby -v
It should say ruby 3.1.3.
You now have Ruby’s latest version installed on your machine. You can now proceed to install the latest Jekyll and bundler gem:
gem install jekyll bundler
How To Install Jekyll on Windows
To install Ruby and Jekyll on a Windows machine, you’d use the RubyInstaller. This can be done by downloading and installing a Ruby+Devkit version from RubyInstaller Downloads and using the default options for installation.
On the last stage of the installation wizard, run the ridk install step — which is used to install gems. Read more via the RubyInstaller Documentation.
From the options, choose MSYS2 and MINGW development toolchain. Open a new command prompt window and install Jekyll and Bundler using the command below:
gem install jekyll bundler
How To Verify That Jekyll Is Installed Correctly
To verify that Jekyll is installed correctly on your machine, open your terminal and run the following command:
jekyll -v
If you see the version number, it means that Jekyll is installed and working correctly on your system. You’re now ready to use Jekyll!
How Do You Create a Static Website on Jekyll?
Now that you have Jekyll installed on your machine, it’s now possible to create a Jekyll static website with one command within a few seconds. Open your terminal and run this command:
jekyll new joels-blog
Ensure you replace “joels-blog” with your preferred site name.
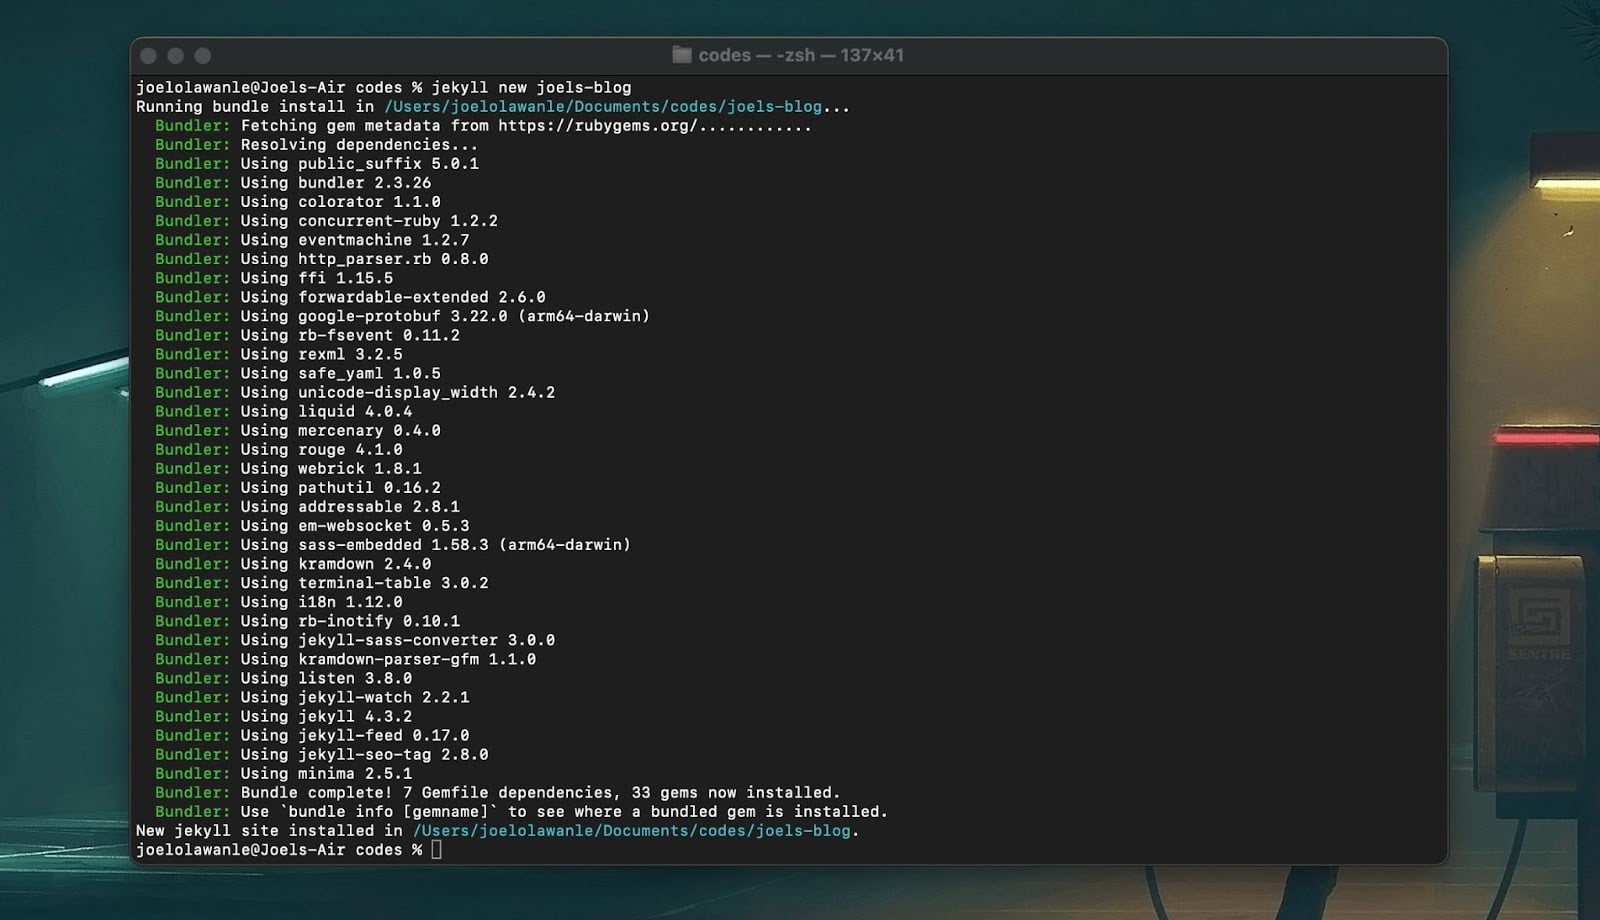
Jekyll static website
Next, navigate to the website folder. You will notice a basic Jekyll site structure that includes directories and files like these:
├── _config.yml
├── _posts
├── Gemfile
├── Gemfile.lock
├── index.md
└── README.md
Here’s what each of these directories and files is for:
_config.yml: The Jekyll configuration file containing your site’s settings and options.
_posts: A directory that contains your site’s content (can be blog posts). These can be Markdown or HTML files with a specific file naming convention: YEAR-MONTH-DAY-title.MARKUP.
Gemfile and Gemfile.lock: Bundler uses these files to manage the Ruby gems on which your site relies.
index.md: The default homepage for your site, generated from a Markdown or HTML file.
But there are more files/folders that can be used to customize your Jekyll website. These folders include:
_includes: A directory that contains reusable HTML snippets that can be included in your layouts and pages. Such as navbar, footer, e.t.c.
_layouts: A directory that contains HTML layout templates that define the structure of your pages.
assets: A directory that contains any files that are used by your site, such as images and CSS files.
_sass: A directory that contains Sass files that can be used to generate CSS for your site.
This file structure provides a solid foundation for a Jekyll project, but you can modify it as needed to suit the specific needs of your project.
Quick Start Option: Use Our GitHub Template
As an alternative to starting your project using the Jekyll CLI, you can create a Git repository using Kinsta’s “Hello World” Jekyll template on GitHub. Select Use this template > Create a new repository to copy the starter code into a new repository within your own GitHub account.
How To Preview a Jekyll Site
You now have a Jekyll site, but how can you preview the website to see what it looks like before you maybe start customizing it to suit your needs? Open your terminal and move into your project’s directory, then run the following command:
jekyll serve
This will generate a _site folder that includes all static files generated from your project. It will also start the Jekyll server, and you can preview your site via localhost:4000.
If you visit the URL in your web browser, you should see your Jekyll site with the minima theme:
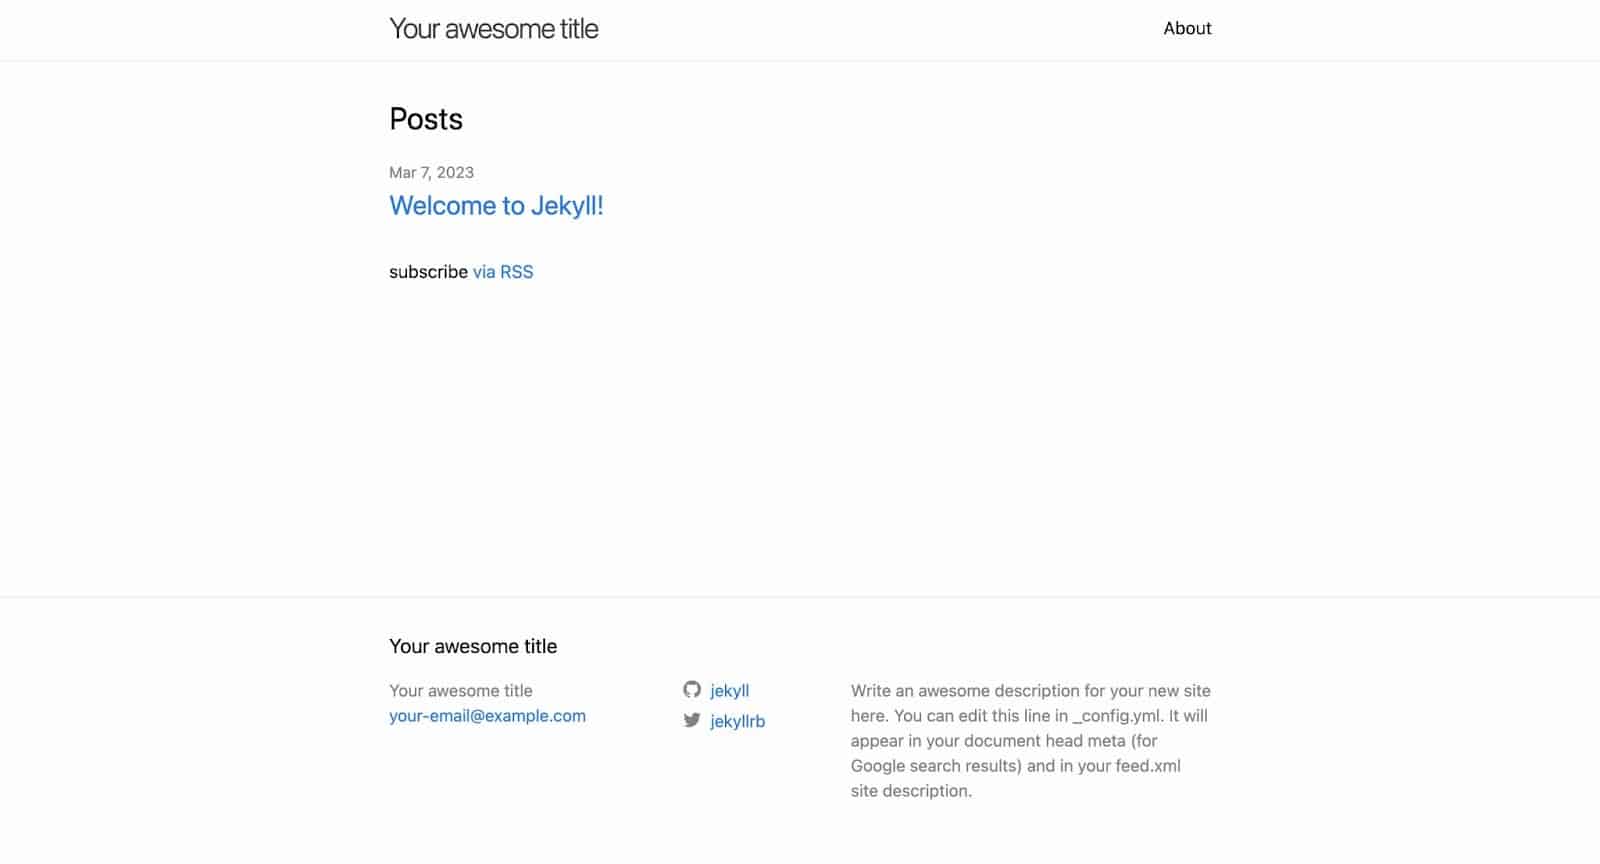
Default appearance
How To Customize a Jekyll Site
When you create a site with Jekyll and use a theme, you can customize the site to suit your needs. For example, you may want to add new pages, change a page’s layout, or adjust how some items are displayed. All these are possible with Jekyll.
How Front Matter Works in Jekyll
When you open each page or blog post of your project folder, you will notice a block of information within three dashes (—) at the top of the page. This is referred to as front matter.
It is a metadata format used in Jekyll, to store information about a page or post — it can be written in either YAML or JSON.
---
title:  "Welcome to Jekyll!"
description: "Introduction to what Jekyll is about and how it works"
date:   2023-03-07 16:54:37 +0100
---
In the example above, the front matter includes variables, such as the post’s title, description, and date. These variables can be used in the page or post’s layout or content.
Jekyll parse’s the front matter and uses it to generate the output HTML for your site. You can use front matter to specify various options, such as layout, permalink, published status, etc.
How To Configure Default Front Matter
You can also configure default front matter, so you don’t need to define the same front matter for similar files. For example, if each blog post uses the same author’s name and layout. You can define a custom front matter in your _config.yml file to serve all your blog posts.
The way it’s structured it’s a little bit complex, but here is what it will look like. Paste this below the last configuration in your _config.yml file:
defaults:
 -
   scope:
     path: "posts" # empty string means all files
   values:
     layout: "post"
     author: "John Doe"
When you now run the jekyll serve command, you will notice that even when you don’t define the layout and author on each post, you still have access to them within your files.
Note: When you don’t define a path, all files will use the defined front matter values.
Creating Pages in Jekyll
When you create a file in the root directory of your project, it is considered a page. The name you give to the file is most times used in the URL, so you’ll name each page file a name that resonates well.
For example, if you want to create a page with the URL example.com/about, create a file named about.html or about.md. The file extension determines the markup language to use for the page content (HTML or Markdown).
Once you have created a file, add appropriate front matter and content. Save the file and refresh your Jekyll site in the browser. The new page should now be accessible at the URL corresponding to the filename.
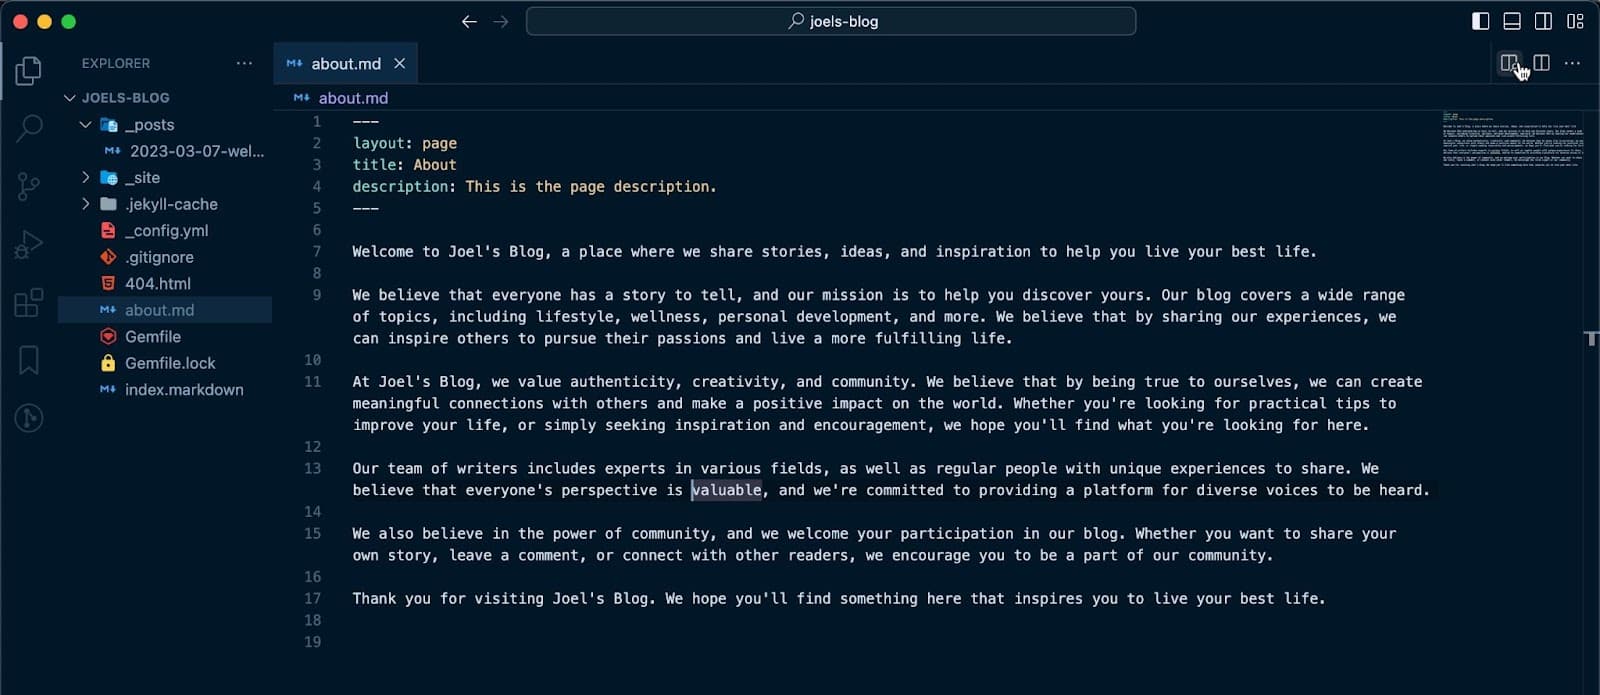
Front matter and content
Creating Layouts in Jekyll
You can use Layouts to define the structure and design of your site’s pages and posts. This is usually done majorly with HTML code. You can include a header, footer, meta information with the page’s metadata.
The first step would be to create a _layouts folder in your project’s root directory. Then create a file for each layout — the file should have a descriptive name that reflects the purpose of the layout. For example, you might create a file named page.html to define the page layout for all pages on your site.
It’s best to define the overall structure of your layouts with HTML or another markup language.
You can include placeholders for any dynamic content that will be inserted into the layout, such as the page title, content, and metadata. For example, you might create a basic layout that includes a header, footer, and content area like this:
<!DOCTYPE html>
<html>
    <head>
        <title>{{ page.title }}</title>
    </head>
    <body>
        <header>
                <!-- Navigation menu goes here -->
        </header>
        <main>{{ content }}</main>
        <footer>
            <!-- Footer content goes here -->
        </footer>
    </body>
</html>
In this example, the {{ page.title }} and {{ content }} placeholders will be replaced with the actual title and content of the page being rendered.
At this point, any page or post that uses page as its layout value in its front matter will have this layout. You can create multiple layouts within the _layouts folder and style your layouts however you like. You can also override a theme’s layout by defining a layout with a similar name.
How the _includes Folder Works in Jekyll
The _includes folder contains reusable snippets of code that you can include in different parts of your website. For example, you can create a navbar.html file in your includes folder and add it to your page.html layout file using the {% include %} tag.
<!DOCTYPE html>
 <html>
     <head>
         <title>{{ page.title }} </title>
     </head>
     <body>
         <header>{% include navbar.html %} </header>
         <main>{{ content }} </main>
         <footer>
             <!-- Footer content goes here -->
         </footer>
     </body>
 </html>
At build time, Jekyll will replace the tag with the content of navbar.html.
The _includes folder can contain any type of file, such as HTML, Markdown, or Liquid files. The principal aim is to keep your code DRY (Don’t Repeat Yourself) by allowing you to reuse code across your site.
Looping Through Posts in Jekyll
You might want to create a dedicated blog page to hold all your blog posts, this means you’d want to fetch all the posts on your site and loop through them. With Jekyll it’s easy to achieve using the {% for %} tag.
All posts on any Jekyll website are stored in the site.posts variable. You can loop through and use the {{ post.title }} Liquid variable to output the title of each post this way:
{% for post in site.posts %}
  <h2>{{ post.title }}</h2>
{% endfor %}
You can also use additional Liquid variables to output other information about each post, such as the post’s date or author:
{% for post in site.posts %}
  <h2>{{ post.title }}</h2>
  <p>Published on {{ post.date | date: "%B %-d, %Y" }} by {{ post.author }}</p>
{% endfor %}
Notice that in the example above, the date Liquid filter formats each post’s date in a more human-readable format.
Now, you have an idea of some basic formatting that can be done to your Jekyll site. But you may not need to use all these to build a Jekyll site from scratch because you can always search for a theme that meets your needs and add it to your Jekyll site.
How To Add a Theme To a Jekyll Site
There are various easy-to-add themes, but the good thing is that for each theme, there is always clear information about how to install them in the ReadMe file on GitHub. You can decide to clone the theme, or if it is a gem-based theme, the process is easier.
For this article, you would install a blog theme and customize it to have a blog site deployed to Kinsta. This is a gen-based theme and you can access its source code and instructions on GitHub.
To add a gem-based theme, open your site’s Gemfile and add the gem for the theme you want to use. The theme we will use is the jekyll-theme-clean-blog. You can replace the default minima theme in the Gemfile:
gem "jekyll-theme-clean-blog"
Run the bundle install command in your site’s directory to install the theme’s gem and its dependencies.
In your site’s _config.yml file, add the following line to specify the theme you want to use:
theme: jekyll-theme-clean-blog
At this point, your theme is ready for use.
You will want to remove all layouts in the _layouts directory to avoid them overriding the theme’s layout.
You can then find the layout names for your files in the theme’s documentation. For example, if you’re using the jekyll-theme-clean-blog theme, the layout names for the index.html file is home, other pages is page, and all posts is post.
Finally, run jekyll serve to build and serve your site using the new theme.
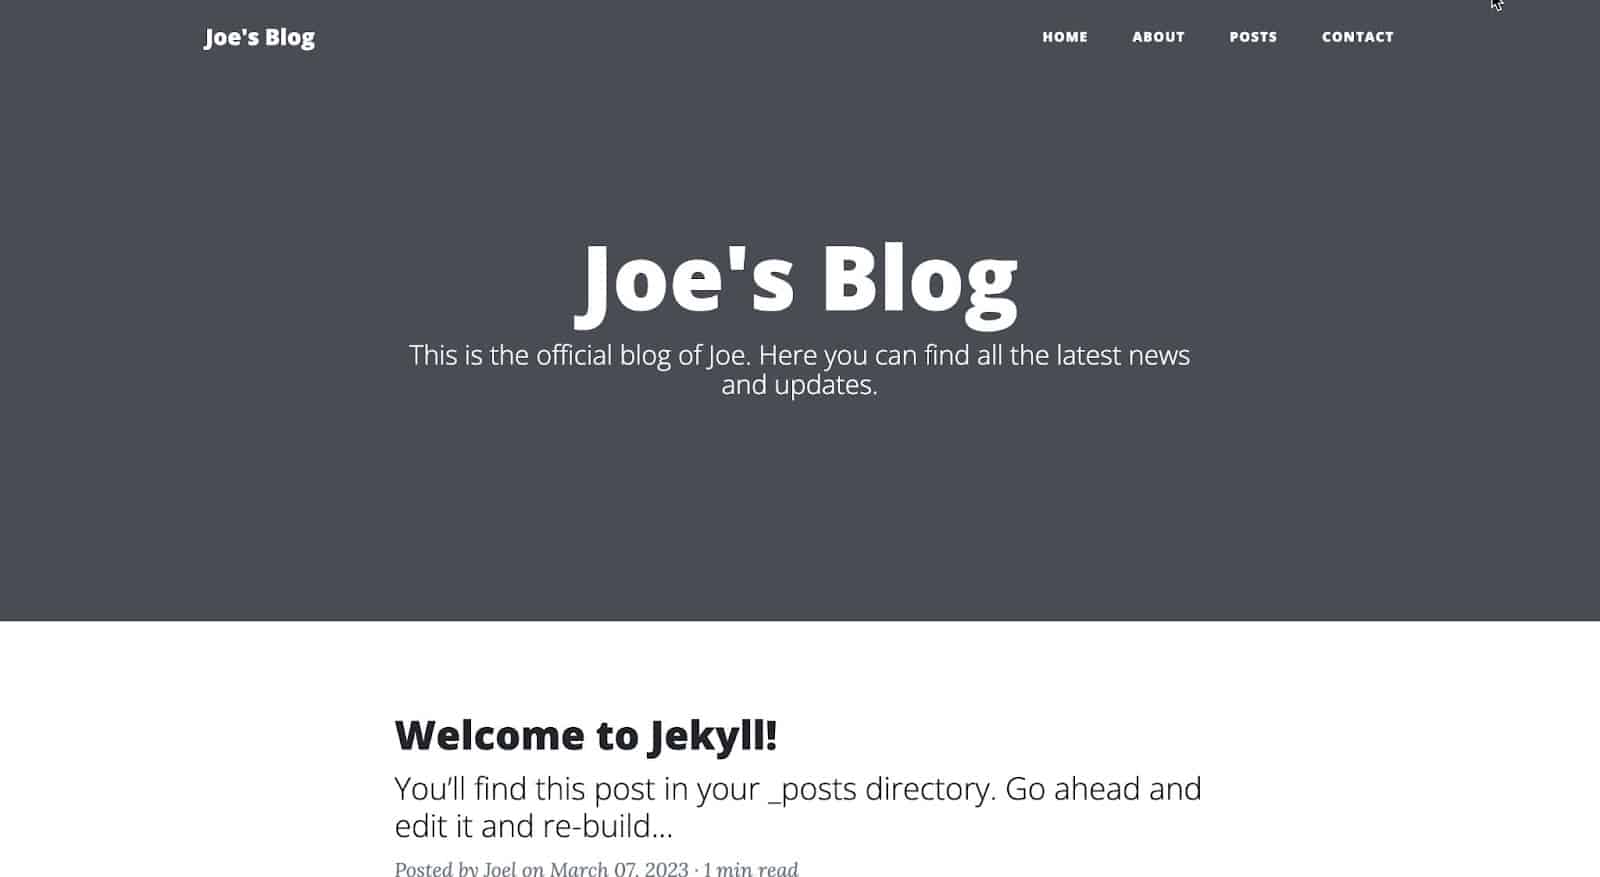
Jekyll blog static site
That’s it! Your Jekyll site should now be using the new gem-based theme you added. You can customize the theme further by modifying its layout in your site’s _layouts directories.
Customize a Jekyll Theme
You now have your theme added to your site, the next action would be to customize the site to meet your needs and work as it is intended to work. For example, the images for each page and post are not displayed rather it displays a grey background.
You can fix this by adding a front matter option to each page and post by specifying the path to an image you wish to use. In Jekyll, assets such as images are stored in the assets folder. In this folder, you can decide to create sub-folders to organize your images.
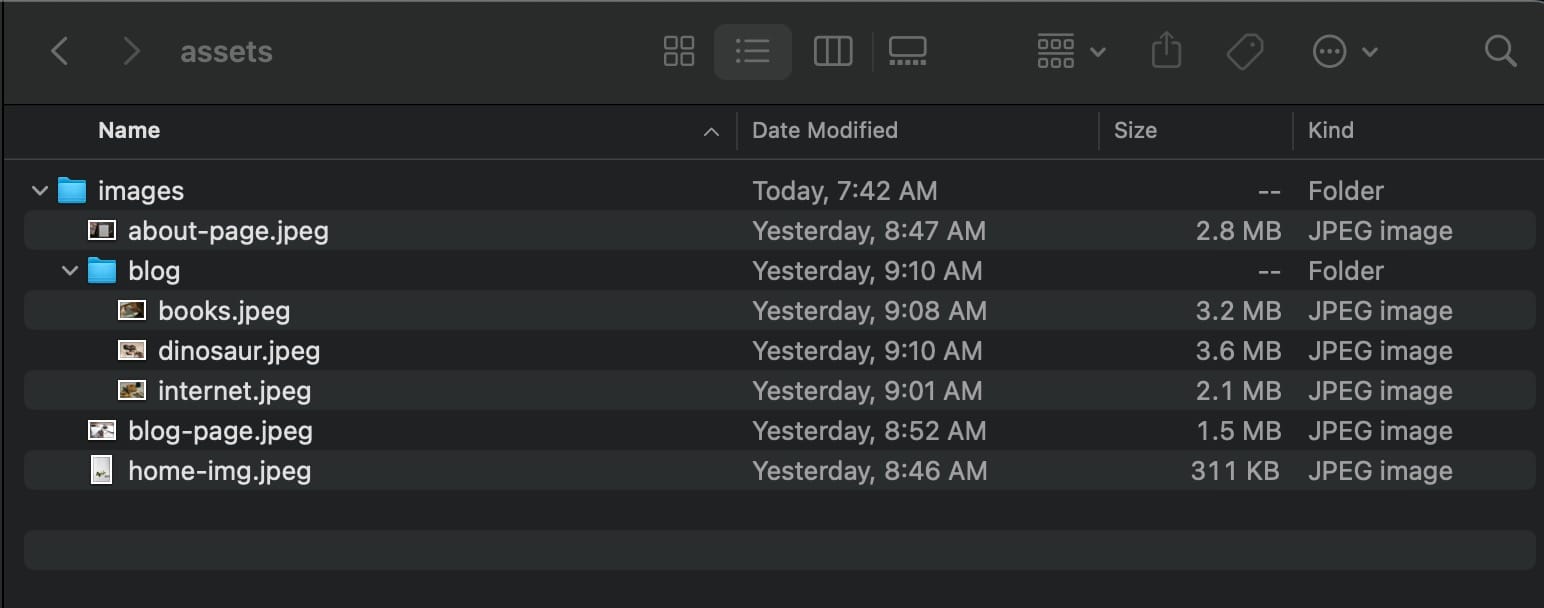
Image folder
You can now add a background option to the front matter block and a path to its image. For example, on the about page, this is the front matter:
---
layout: page
title: About
description: This is the page description.
permalink: /about/
background: '/assets/images/about-page.jpeg'
---
Do this for all pages and posts and your page will look like this:

Background image is shown on the About page
Another customization you can do is adjust the navbar options. For example, you may not need a contact page, meaning you should remove its link from the navbar options. You can do this by studying the theme’s source code, noticing the file responsible for the nav links, and replicating the file exactly in your project, removing the option you don’t need.
The nav links are in the _includes folder’s navbar.html file. You can create this file, paste the code from your source code, and remove the contact option or add any new option you wish.
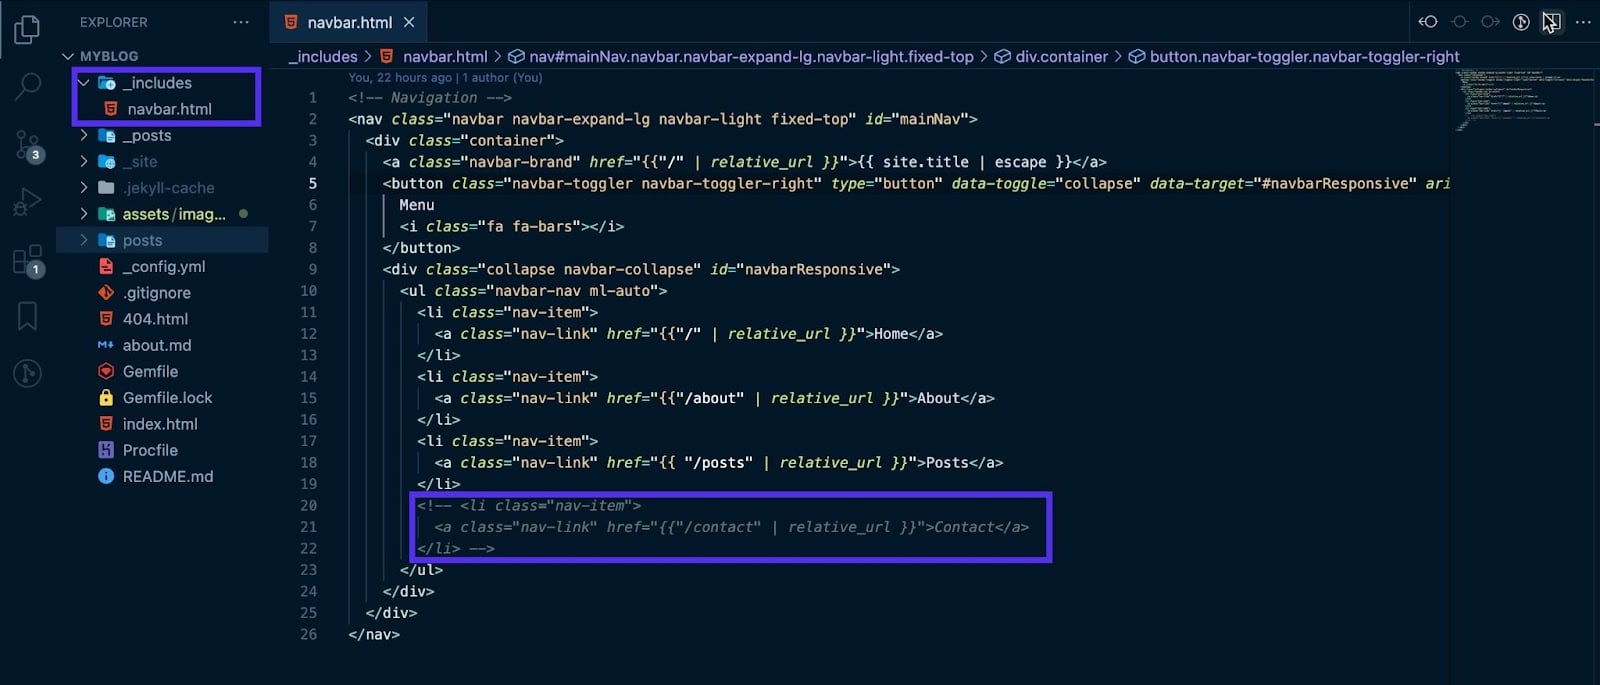
Customizing the navbar from the Jekyll theme
When you save your project, you will notice the nav options will be customized:

Fully customized nav bar
Finally, one last customization would be creating a posts page that will hold all your blog posts — which means you will loop through all the posts on this page.
Create a file, posts.html and paste the following code:
---
layout: page
title: Blog
description: Expand your knowledge and stay informed with our engaging blog posts.
background: '/assets/images/blog-page.jpeg'
---

{% for post in site.posts %}

<article class="post-preview">
    <a href="{{ post.url | prepend: site.baseurl | replace: '//', '/' }}">
        <h2 class="post-title">{{ post.title }}</h2>
        {% if post.subtitle %}
        <h3 class="post-subtitle">{{ post.subtitle }}</h3>
        {% else %}
        <h3 class="post-subtitle">
            {{ post.excerpt | strip_html | truncatewords: 15 }}
        </h3>
        {% endif %}
    </a>
    <p class="post-meta">
        Posted by {% if post.author %} {{ post.author }} {% else %} {{ site.author
        }} {% endif %} on {{ post.date | date: '%B %d, %Y' }} · {% include
        read_time.html content=post.content %}
    </p>
</article>

<hr />

{% endfor %}
Feel free to adjust the background image to reflect your saved image. In the code above, you are looping through all the posts to display all posts on this page. This is what the posts page will look like when saved.

Posts page
How To Add Content To a Jekyll Site
You have now created a Jekyll site and configured the site to meet your needs. The last step would be to add content or learn how content can be added to a Jekyll site.
All content is stored in the posts folder. Each content is stored in a file with a similar naming convention of YYYY-MM-DD-title.md (or .html for HTML files). For example, if you want to create a post called “My First Post”, create a 2023-03-08-my-first-post.md in the posts directory.
Next, for each post/content file, ensure you add front matter about the post at the top. This will include the layout, title, description, date and other information.
---
layout: post
title: "How to Read Books: Tips and Strategies for Maximum Learning"
subtitle: "Reading books is one of the most powerful ways to learn new information, gain new perspectives, and expand your knowledge."
date: 2023-03-02 23:45:13 -0400
background: '/assets/images/blog/books.jpeg'
---
Then you can add your content below the front matter block with HTML tags or markdown syntax.
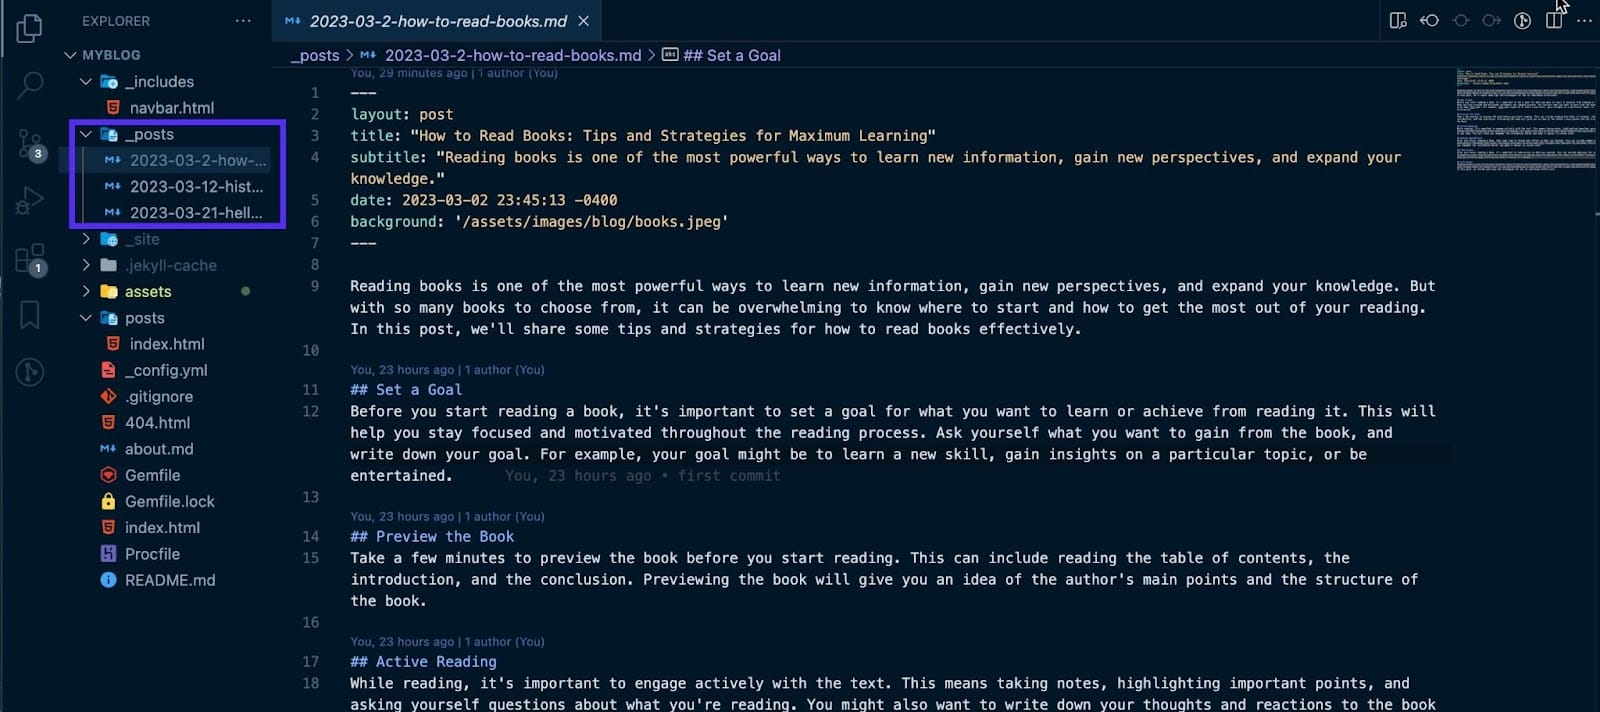
Adding new posts to the _posts folder
Save the file, and Jekyll will automatically build and include it in your site.
Summary
So far, you have learned how Jekyll works and the various customizations that you can do with Jekyll. It’s now safe to agree that Jekyll is an excellent tool for creating static websites due to its simplicity, flexibility, and powerful features.
Jekyll’s intuitive templating system, liquid templates, and built-in support for markdown and other markup languages make it easy to create and manage content-rich sites quickly.
Feel free to host all your static websites with Kinsta’s Application Hosting for free, and if you like it, opt for our Hobby Tier plan, starting at $7/month.
What is your thought on Jekyll? Have you utilized Jekyll to build anything? Please feel free to share your projects and experiences with us in the comments section below.